Pinball bumper
First, how do they work?
Draw in SketchUp
While you can use Marble Run Maker's simple 3D scripting language to describe 3D shapes by hand, sometimes you want a more complicated shape. Here we'll show you how to draw your contraption using the free SketchUpMake 2017, and then improve the contraption with logic and motion in Marble Run Maker. I won't go into detail on using SketchUp -- the spiral ball lifter contraption I built in SketchUp gives a bit more detail if you want it.
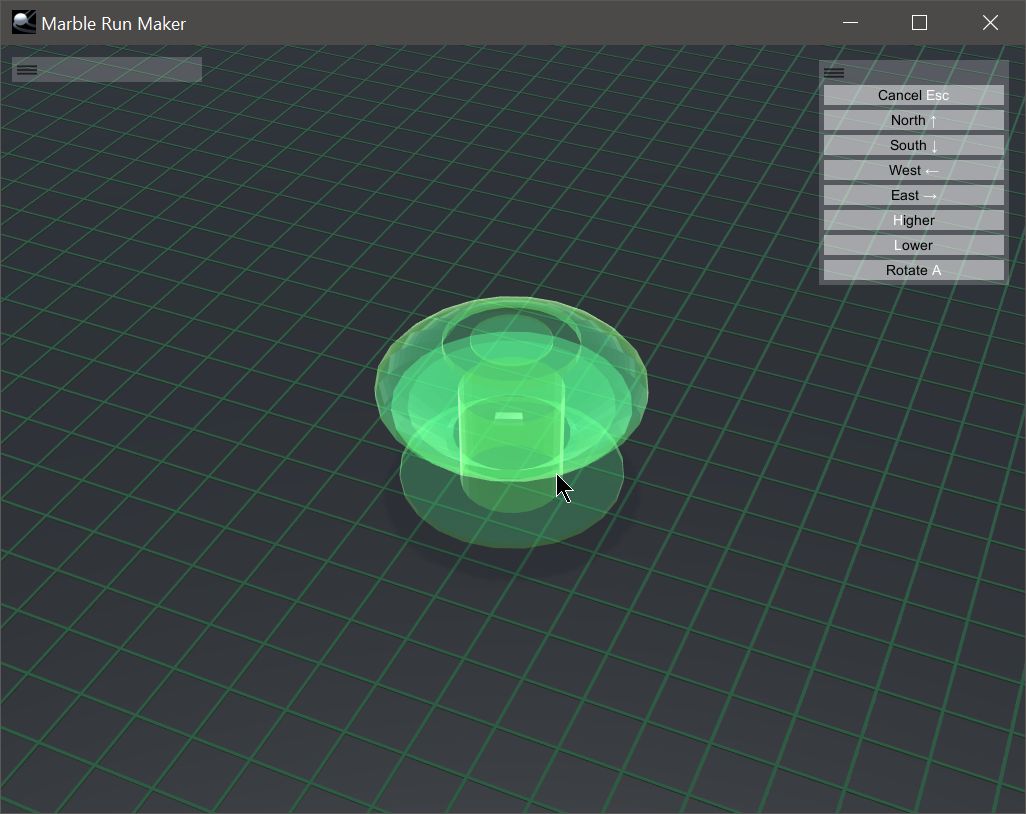
Part 1: the stationary base
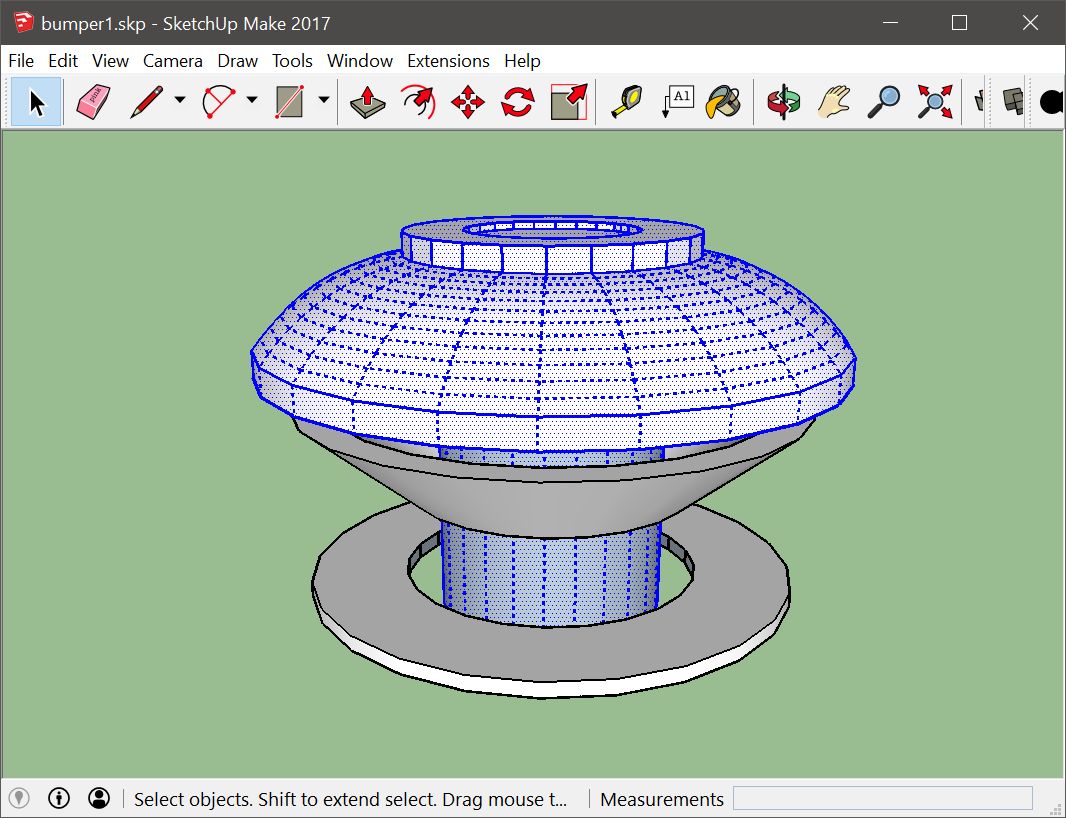
The stationary base, outlined in blue above, doesn't move. In the code below, the three dot ellipsis (...) is where I took out some of the shape data. If you want the full code for this Contraption, it's here.
name
thestationarybase
shape
2.3351,-0.0771,1.9883 to 2.3352,-0.076,1.9883 to 2.3352,-0.076,2.1953
...
0.7293,0.0161,3.0315 to 0.7184,0.0986,2.9715 to 0.7293,0.0161,2.9715
Part 2: the plunger
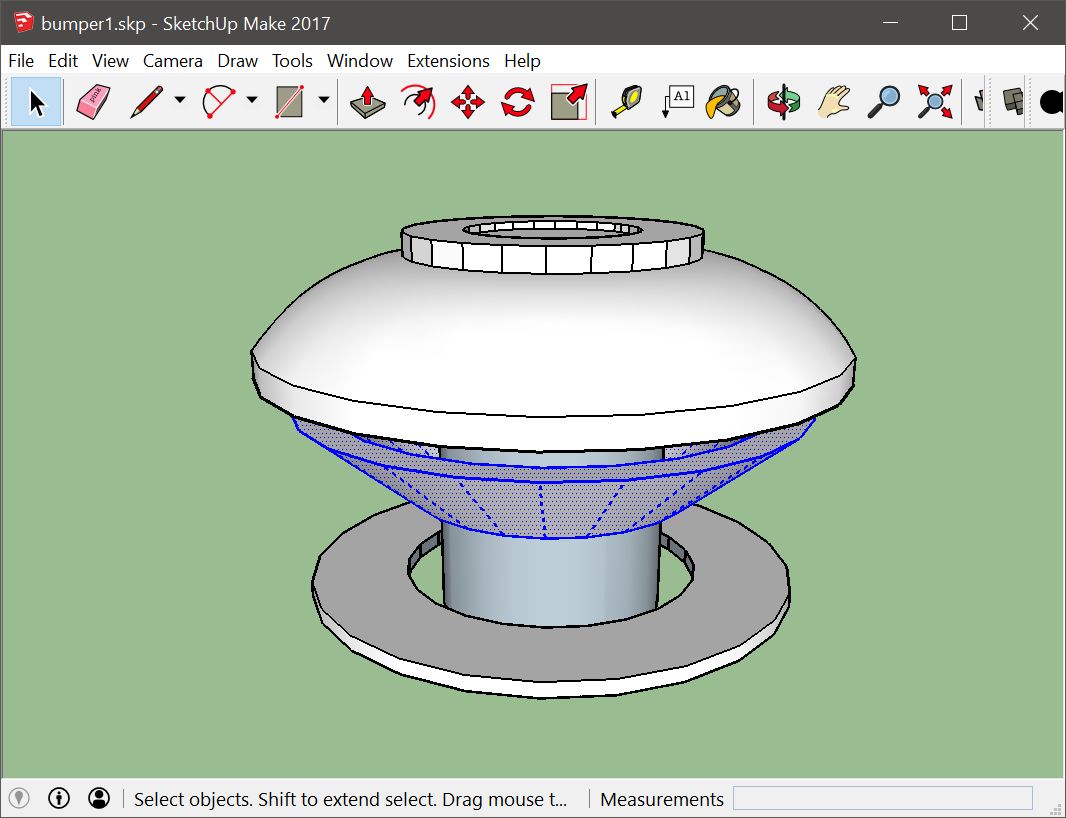
The plunger, outlined in blue above, will slide "down" a distance of "1.5," and then back "up" the same distance. It happens fast: (speed = 25, as you can see in the code below). The plunger has an angle to it. So when it slides down quickly, it kicks out any balls underneath it. There's a slight pause (0.1 seconds) after the down/up movement, to simulate the reset of a real pinball machine.
Of course, you can change how far and how fast the plunger moves, and remove the pause if you don't like it. It's up to you.
name
theplunger
activationmethod
trigger
shape
1.1649,-0.3717,0.9807 to 1.0348,-0.3369,1.0673 to 1.0689,-0.0767,1.0673
...
1.4993,-1.5113,1.7141 to 0.588,1.8832,1.7141 to -1.8961,-0.6033,1.7141
movement
slide
direction>down
speed>25
distance>1.5
slide
direction>up
speed>25
distance>1.5
pause
time>0.1
Part 3: the trigger
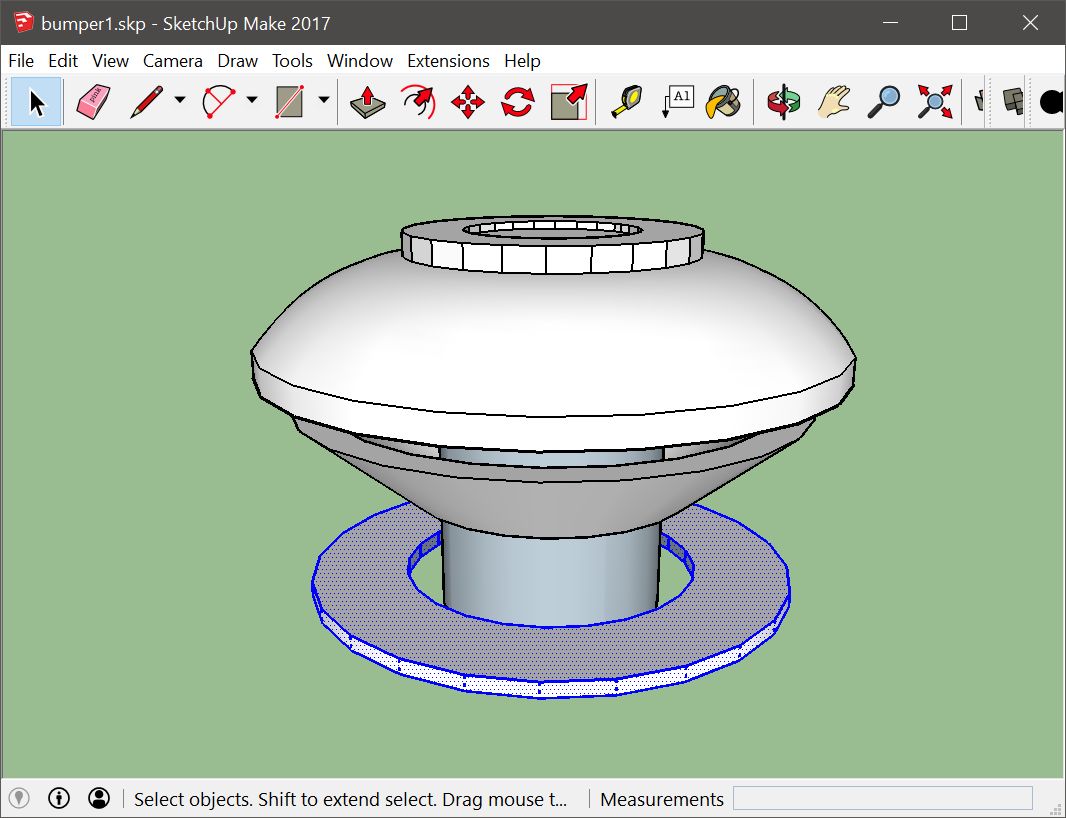
The trigger, outlined in blue above, has some unique code below. First, note that its type is "trigger". This means two things:
- There is no mass or substance to this object -- balls and boxes will pass right through it.
- When things like balls, boxes or other contraptions hit this trigger, it tells some other part of your Contraption to start moving.
This piece is triggeredby "ball," as shown -- that is, any ball that touches the trigger will engage it. If you don't include the triggeredby section, the trigger will default to "ball, box," which means any color ball and any color box will trigger it.
The triggerthisname specifies that the trigger should alert "theplunger" to start its movement when the trigger is hit by a ball.
name
thetrigger
type
trigger
shape
-1.8253,-0.5843,0.3 to -1.6296,-1.0559,0.3 to -1.3186,-1.4608,0.3
...
-1.6296,-1.0559,0.3 to -1.8253,-0.5843,0.18 to -1.6296,-1.0559,0.18
triggerthisname
theplunger
triggeredby
ball
Note that the scripting language also allows you to specify "contraption" as a trigger, which means that another contraption moving into the trigger will cause it to fire. This lets you build complex daisy-chained machines where timing is important. You can also specify colors of balls and boxes. For example, this is a valid triggeredby use:
triggeredby
red ball, yellow ball, orange box, blue box, white box, contraption
Here's what it looks like
Here's the SketchUp file for the pinball bumper if you want to use it.
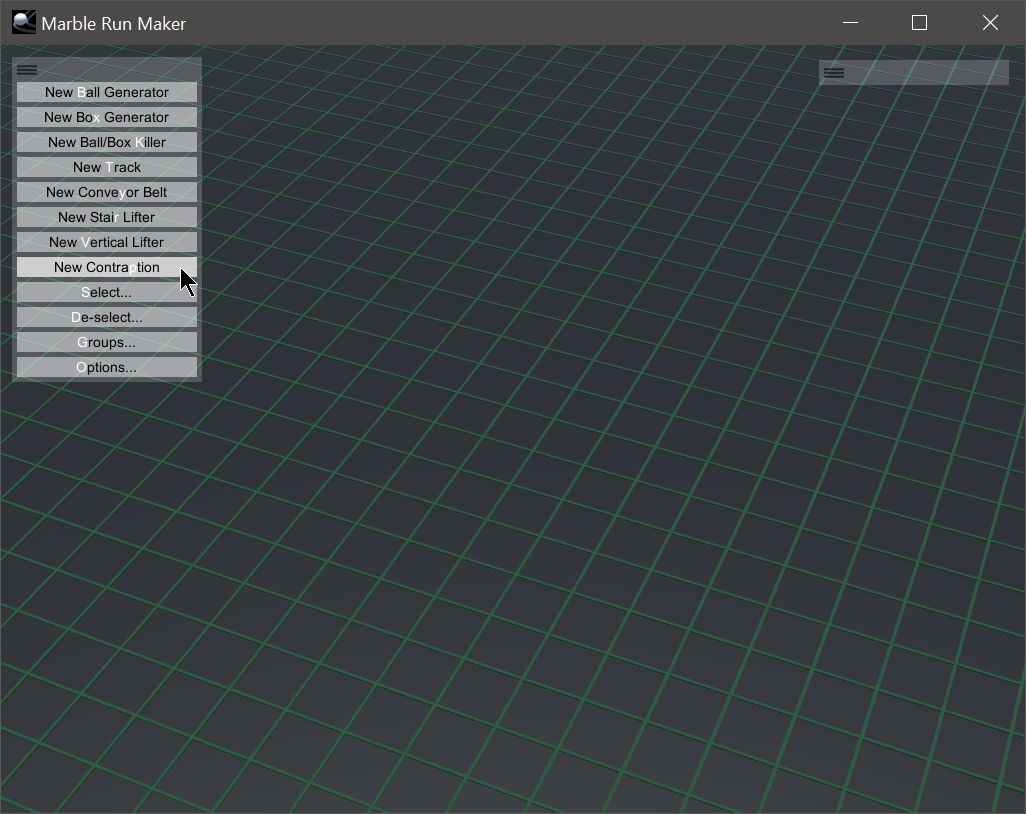
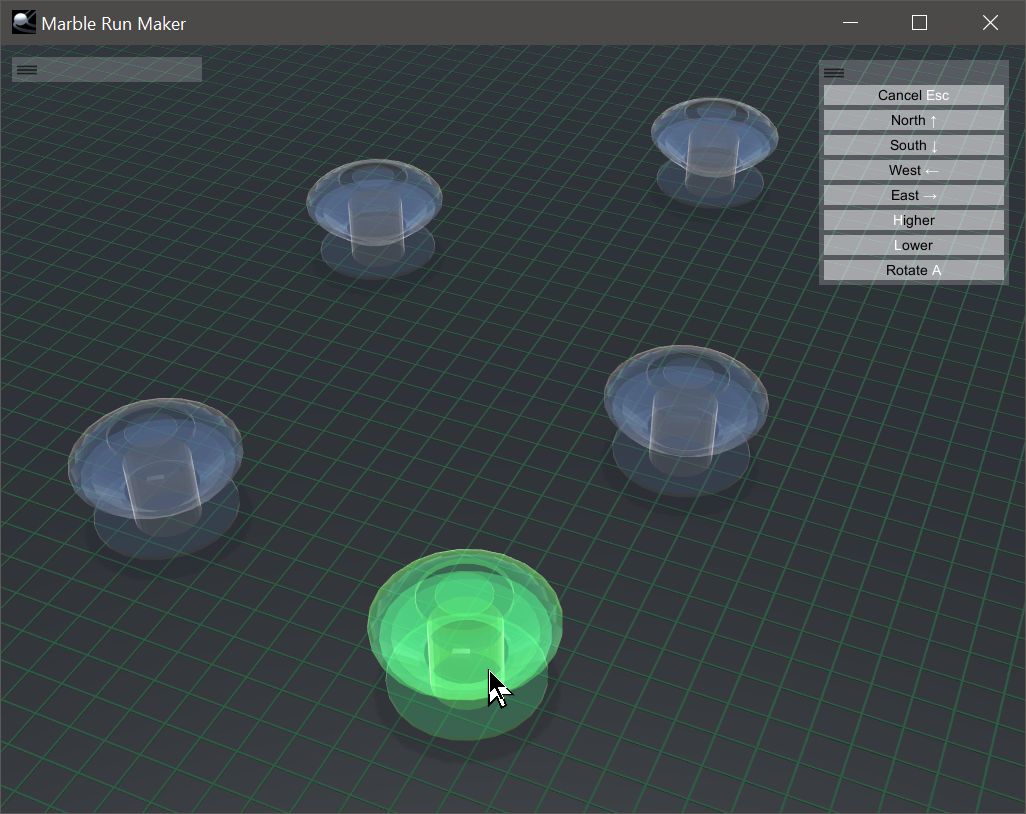
Placing contraptions
Copy the Contraption code here to the clipboard -- Control-A selects All, Control-C will copy. While it's in your clipboard, just click "New Contraption," or press P, in Marble Run Maker. The contraption will appear under your mouse cursor. Drag it where you want with the mouse, and click to place it. You can also use the arrow keys to fine-tune the placement. You can move it around later if you want, or delete it.
You can press P multiple times, in quick succession. Each time, a new copy of the Contraption will drop into place, and you can place it individually using the mouse or the arrow keys.
You can build a pinball machine very quickly. All the contraptions work independently. The bumpers will send the balls blasting into each other, just like you'd expect.
You can also export the Contraption code to your clipboard. Just select the contraption you want to export, then type OPE (or click the buttons Options, Contraption Options, Export).
Exporting your whole scene
How do you save your Scene after you arrange a bunch of contraptions, balls, boxes, tracks and treadmills? Just click OSE (Options, Save, Export). This saves your Scene to the clipboard. That Scene code includes everything: the camera position, all the contraptions and their code, balls, tracks, conveyors, boxes, groupings of objects and saved camera positions (if you have any). Here is the Scene code for the Scene in the video above if you want to use it. Remember: Scene codes obviously include Contraptions, and thus the individual Contraption codes for each. With the Scene code, you can export and modify the embedded Contraptions to your liking.
Importing your whole scene
To import a scene, copy the Scene code to your clipboard, then type OSI (buttons Options, Save, Import).
Why the clipboard?
The clipboard makes things simpler. There are no files you have to download or manage. The code for Contraptions and Scenes are all plain-text, and easily copied and shared from this website or anywhere else. Further, since your Contraptions are designed to be coded and modified by hand, using plain text supports the scripting nature of the language.