Track Profile
Create your own track profiles
A track's profile is its cross-sectional shape. Marble Run Maker lets you use any profile that you can dream up.
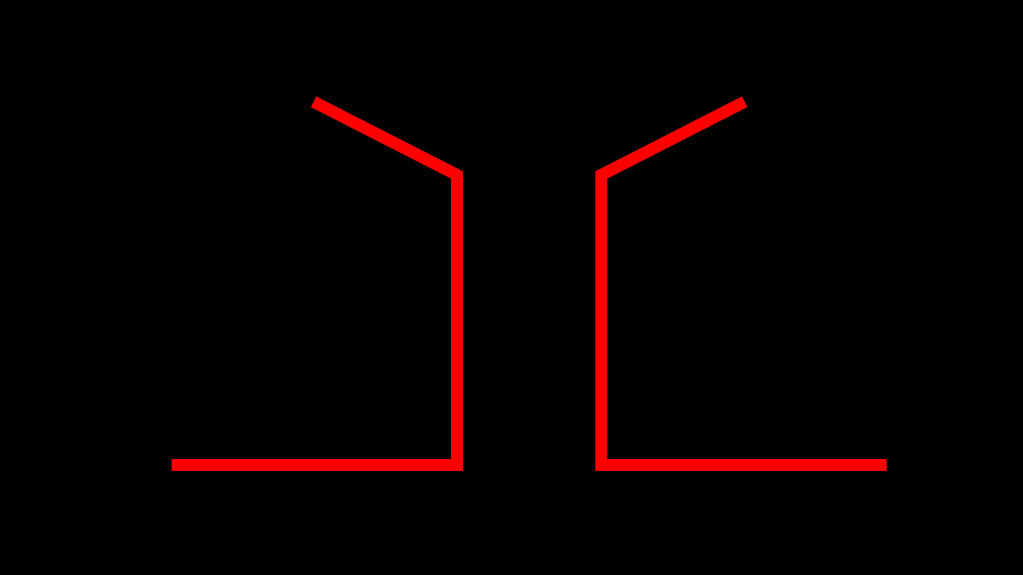
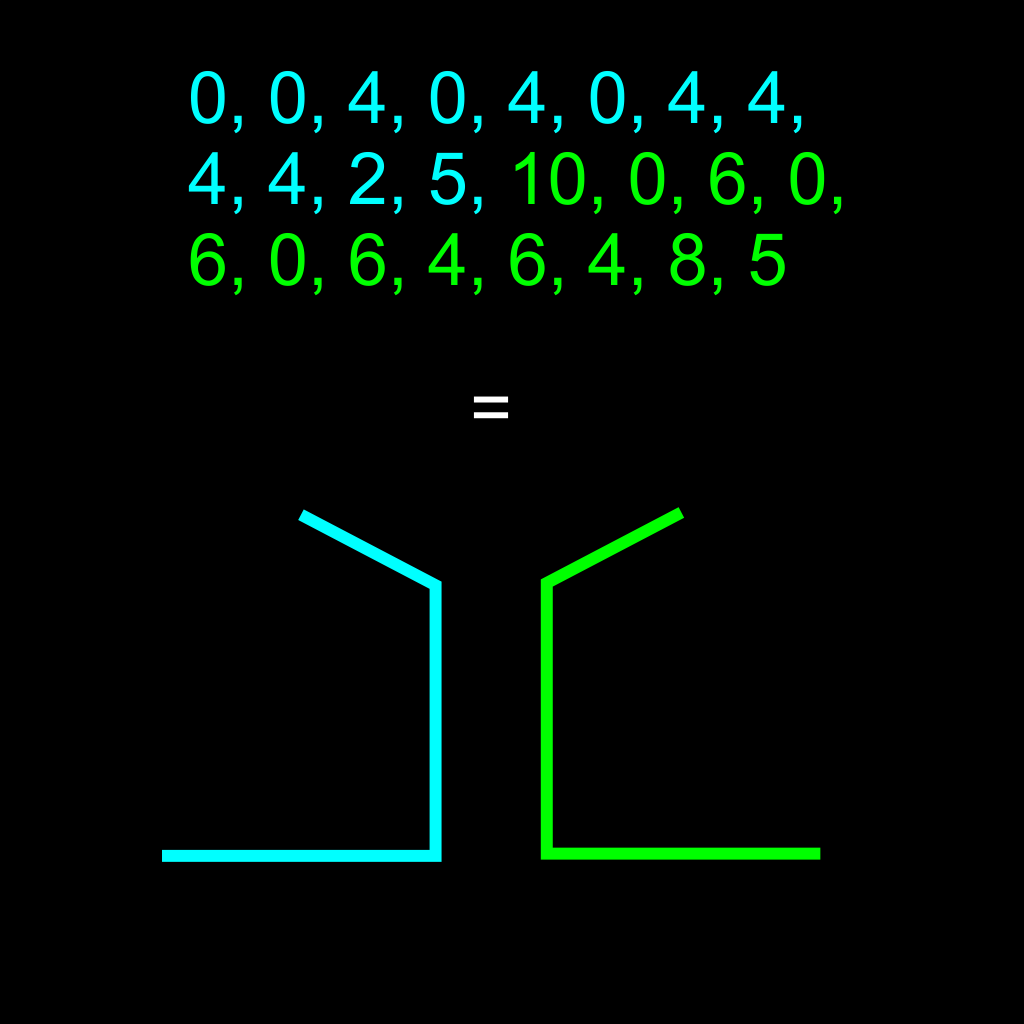
Your track profile can be continuous or discontinuous--it's up to you. In the example below, we will create a Y that sits on a broad base. It's a discontinuous track profile, which means that the track is made up of two independent halves that are not connected, as you can see here:
Imagine a track shape
Sketch
Sketch out your cross-sectional profile on a piece of paper.
Choose a grid size
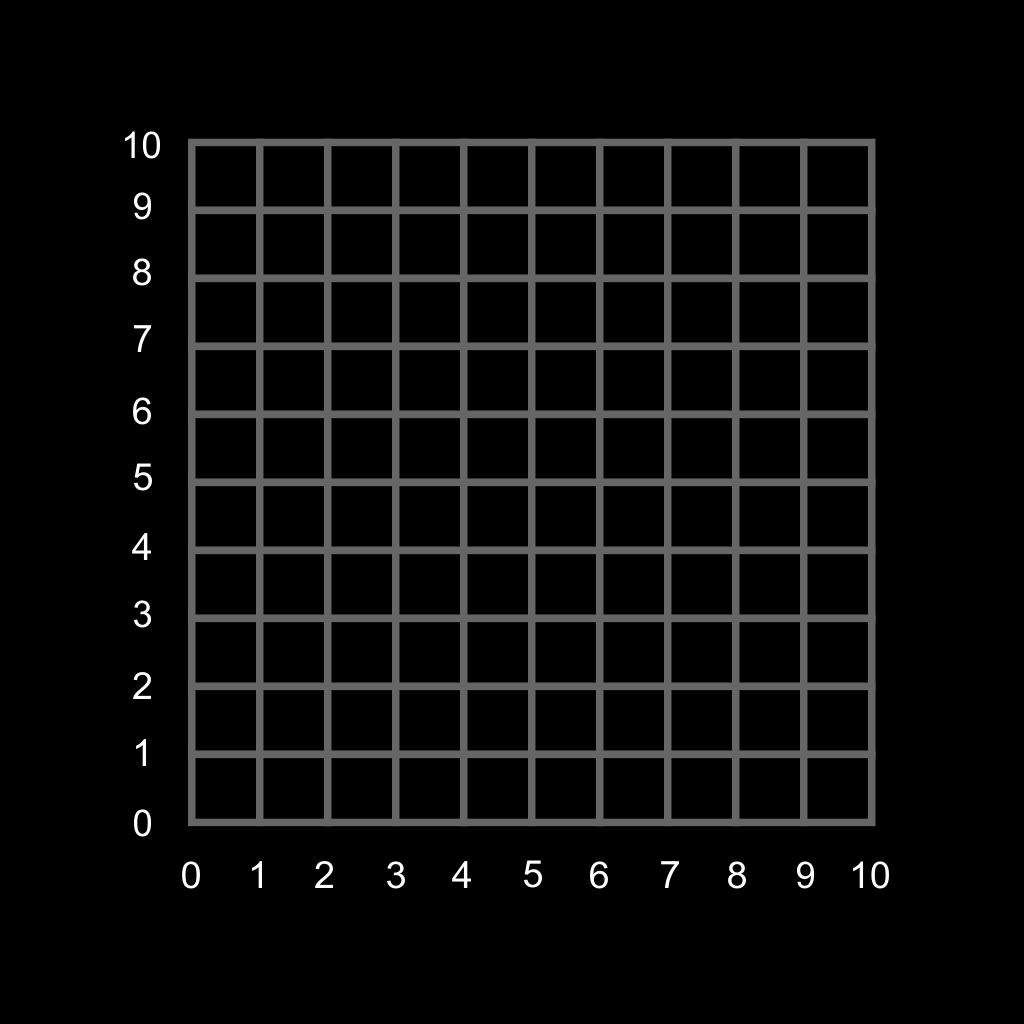
Now sketch out a grid. The grid can be 2x2 or 10x10 or 1000x1000. It's up to you. Use larger numbers if you need fine degree of detail.
We will use 10x10, as shown here.
Draw on the grid
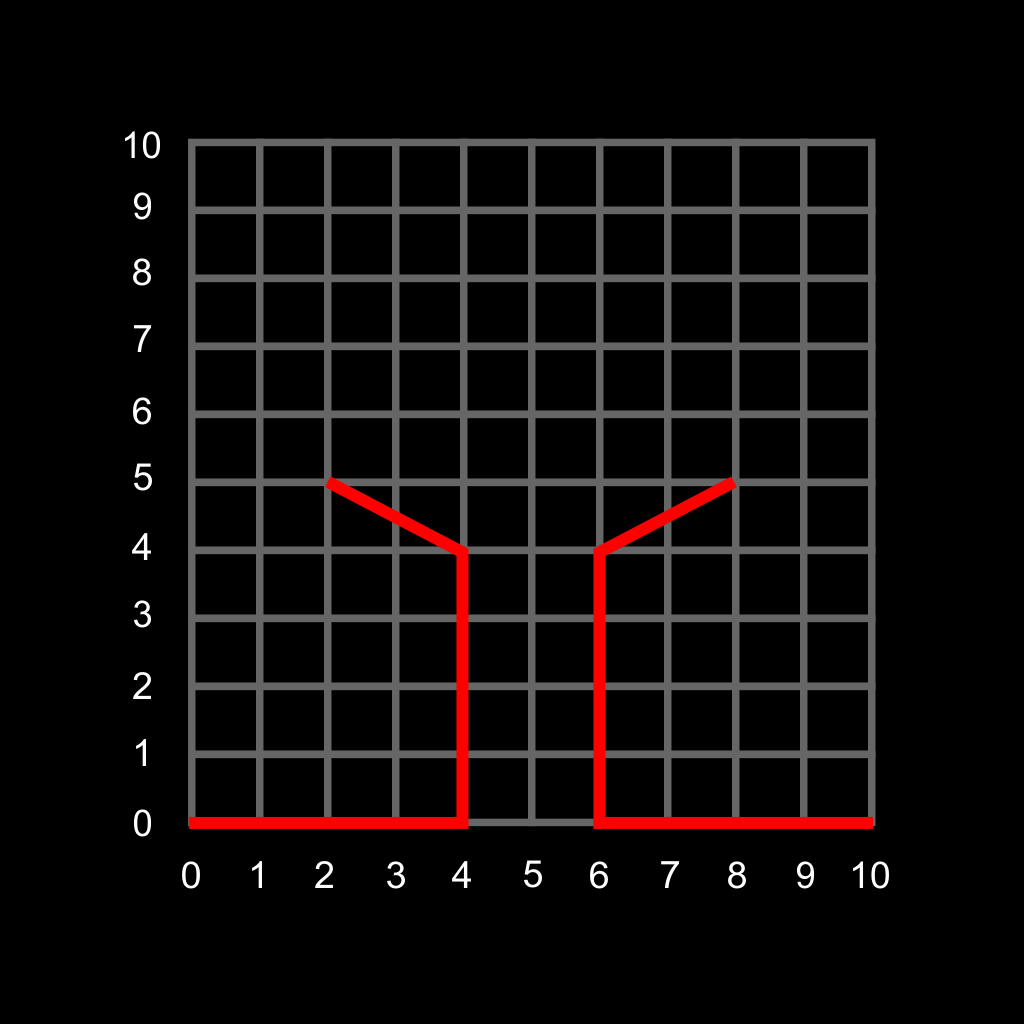
Draw your track profile on your grid.
Find endpoints
Note the points where each of your lines end. We've color-coded it here to make it easy.
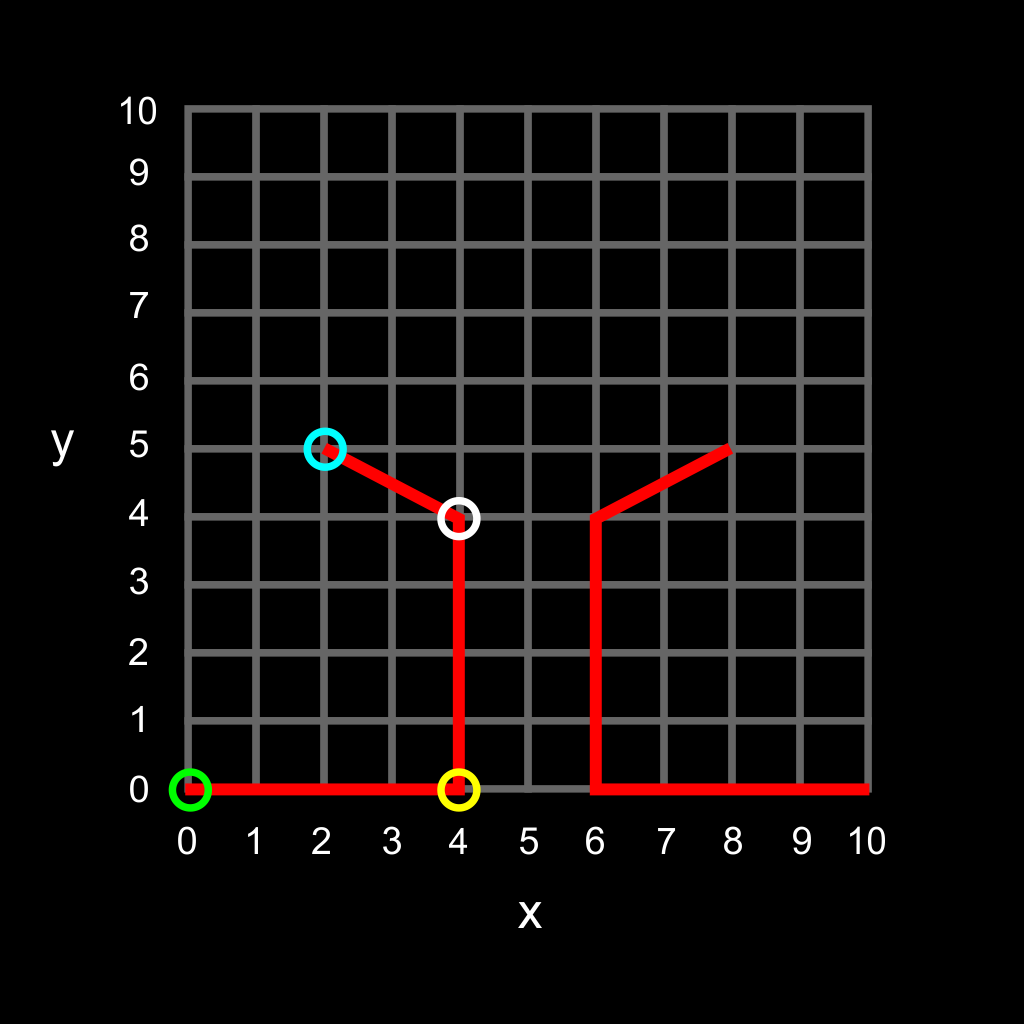
Since our profile is made up of a left half and right half that are mirror images of each other, we will look at just the left side to make it simpler. The right side will be easy once you understand it.
Use the x,y coordinates of your graph to get the x,y value of each segment's endpoint.
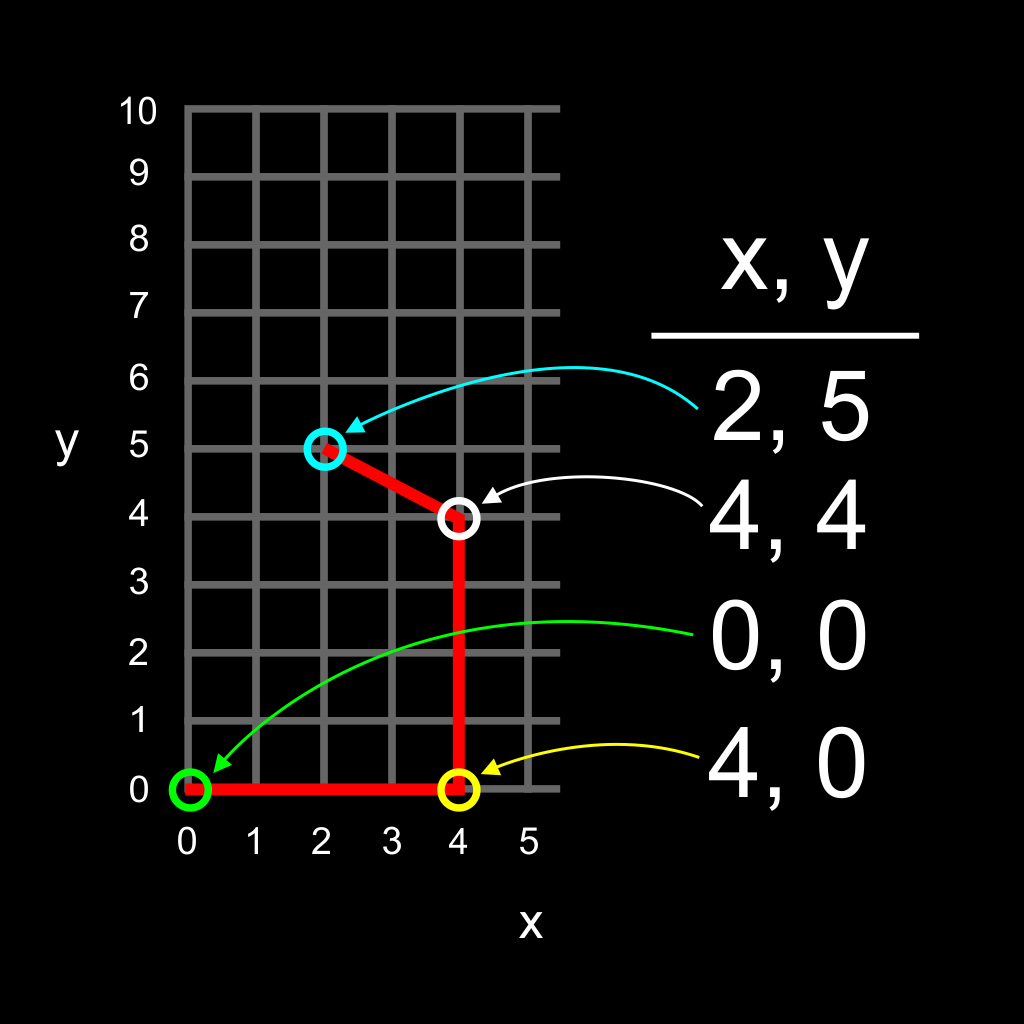
Find line segments
The left-half of your profile is made up of 3 line segments. These are the coordinates of the endpoints.

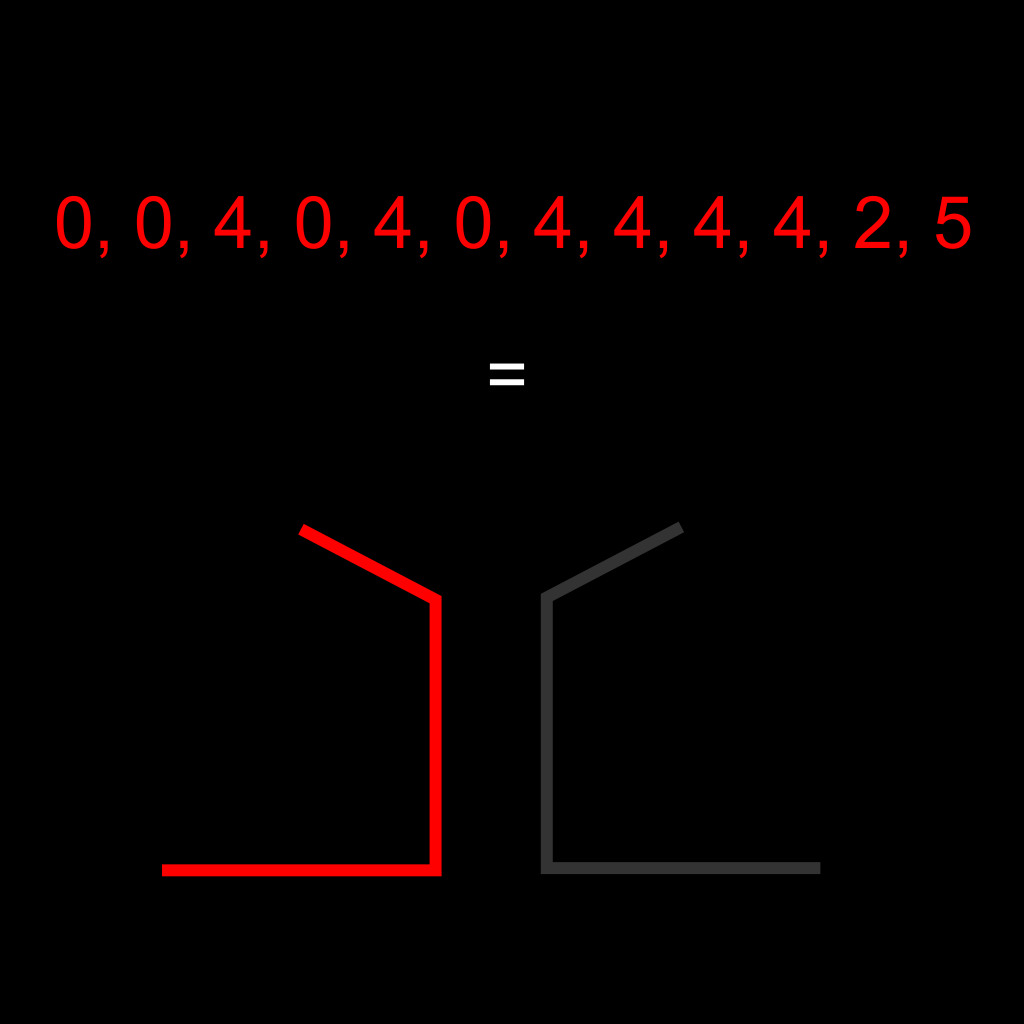
Take the endpoints and write them down. Nothing fancy--just separate them with commas.
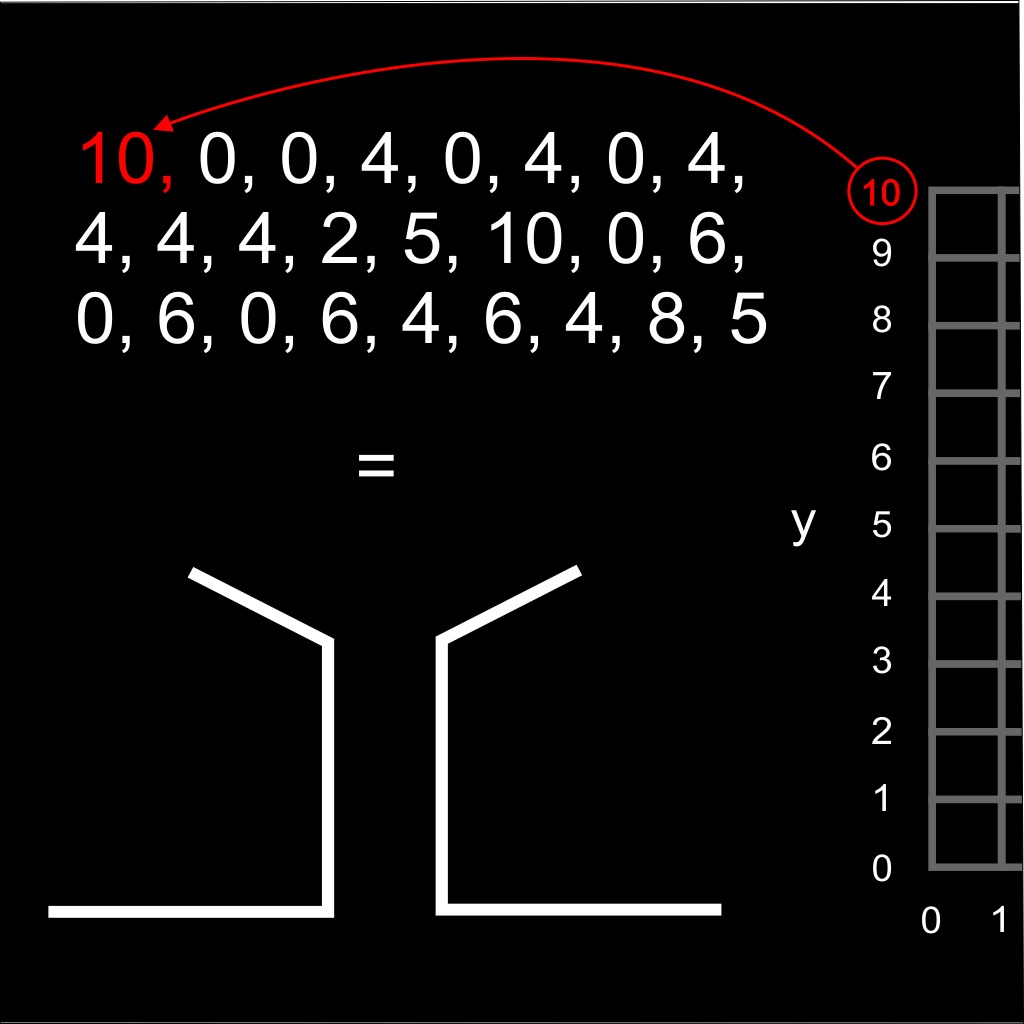
The code for the left half of our profile, shown in red below, is 0,0,4,0,4,0,4,4,4,4,2,5. It doesn't matter if you use spaces or not. It will also work if you use 0, 0, 4, 0, 4, 0, 4, 4, 4, 4, 2, 5.
The right half works the same way. We did it for you below. If you don't understand what we did, or where these numbers come from, try to find them yourself using the grid.
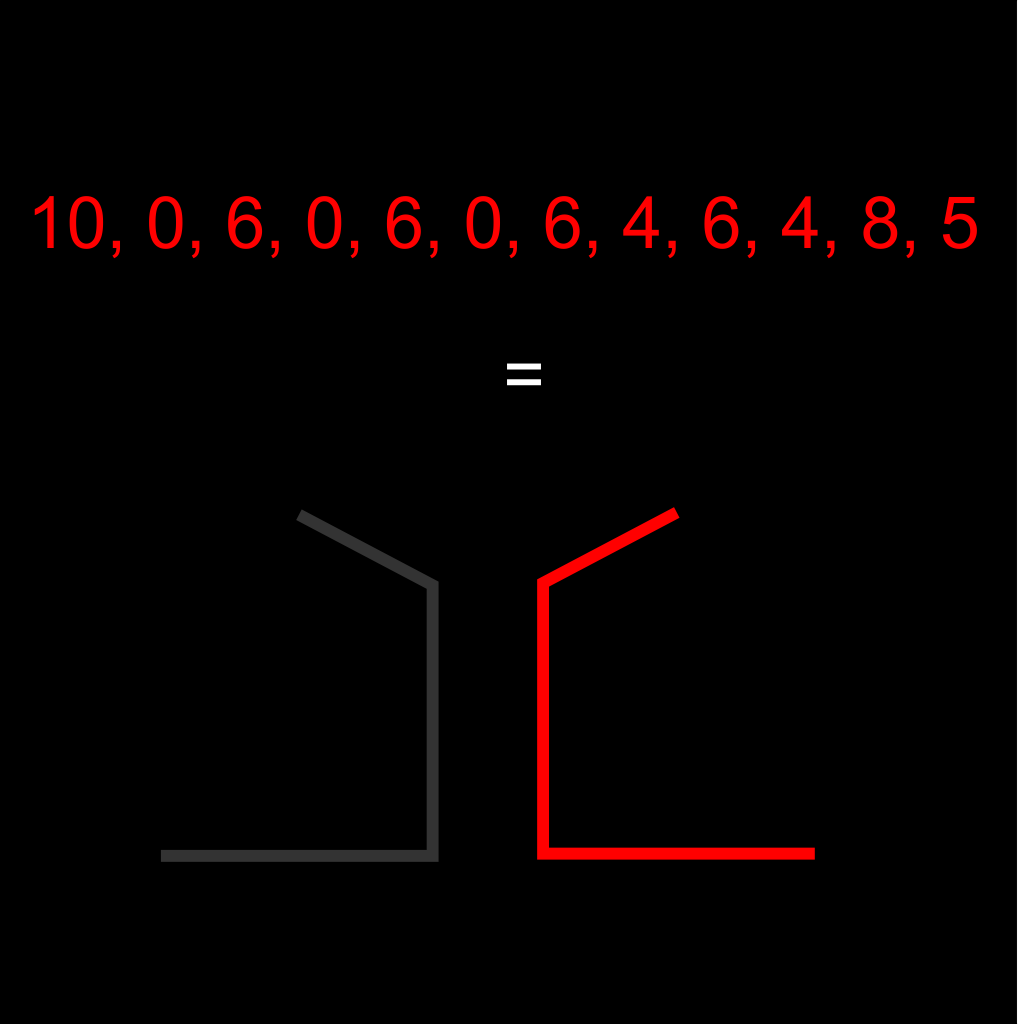
Now simply put the two number strings together, separated by commas. Again, spaces don't matter.
Note your grid size
The last step: tell us how big your grid is. In this case, we used a 10x10. Put the 10 in the front of your string.
Interesting tip: if you put a number here that is smaller than your actual grid, your track will appear huge, and lead to interesting effects when you widen or narrow the track.
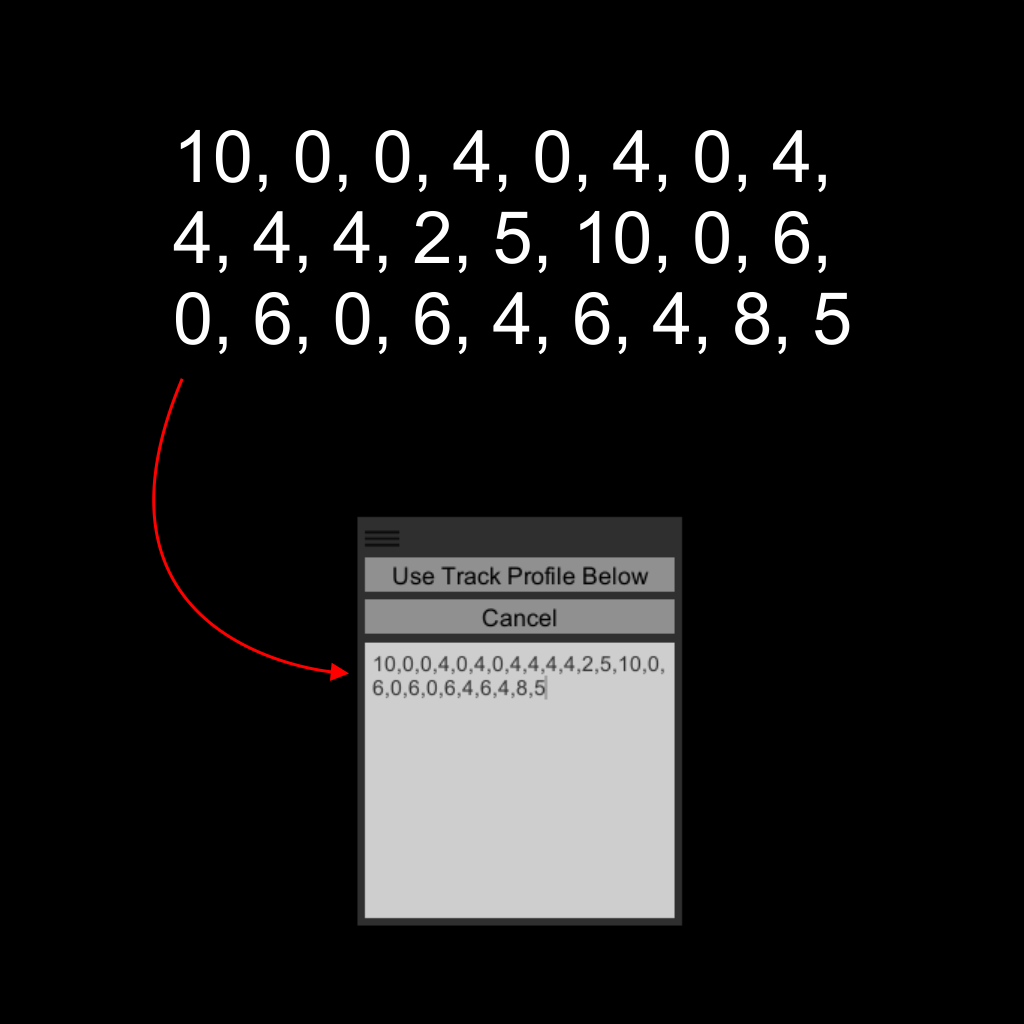
Enter your profile
All that's left is to enter this number into Marble Run Maker's track profile window. You can get here by tapping OTN on your keyboard (or, via buttons: Options, Track Options, New Track Profile). Click "Use Track Profile Below" when you're done. From this moment forward, any track you draw will use this profile.
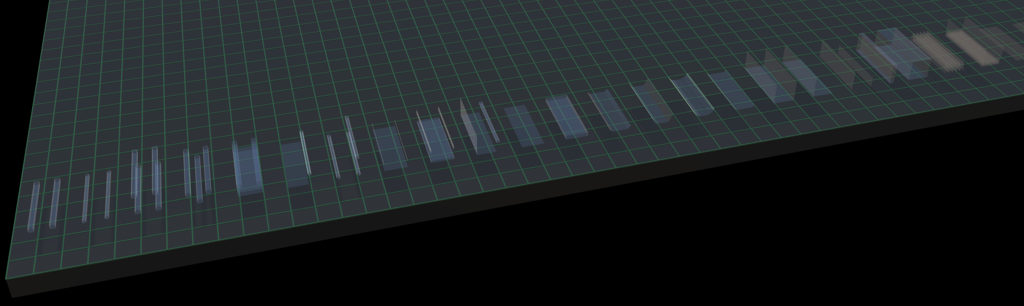
Results
Here's what it looks like, applied to a few simple paths:
I introduced the balls slowly because this profile has no side supports. If the balls moved any faster, they'd jump the track. You could redesign the profile to allow quick turns.
Notice that any track profile can be made wide, or narrow, tall or short, with as many motor lifters as you want. In this example, if you'll notice, I widened the track in one spot just enough to let the balls fall to the bottom of the groove. A motor then lifts them back up as the track narrows again. If I had widened it one notch more, balls of a certain size would fall through. You can sometimes use this to your advantage.
Download this scene here.
You can load this scene two ways. The first way: select all of the text (Control-A), then copy (Control-C) the text to your clipboard. Type OSI in Marble Run Maker (Options, Save/Load Scene, Import From Clipboard). Marble Run Maker will import the scene, with your new track profile embedded. A second way to open the scene: download the text file, right-click it, then select Open With... Marble Run Maker.
Built-in profiles
Press OTD (Options, Track Options, Display Sample Profiles) at any time. Marble Run Maker will load along the edge of your scene a few dozen sample track profiles to get you started. You can copy, apply, and modify these to your liking.
A few tips
- You will quickly realize that you don't need to draw a grid or write down a single thing to create a profile. With a little practice, you can do it fully from your head, as we did with this example before creating this tutorial.
- You can create as many track profiles as you want, and you won't lose any of them as long as there is at least one piece of track with the profile in your scene. You can copy that track's profile to memory, and apply it to any other track, or design new tracks with it. The key combo for this, after selecting a track, is OTC (via buttons: Options, Track Options, Capture Track's Profile).